Master 3’s retired Rudolfs

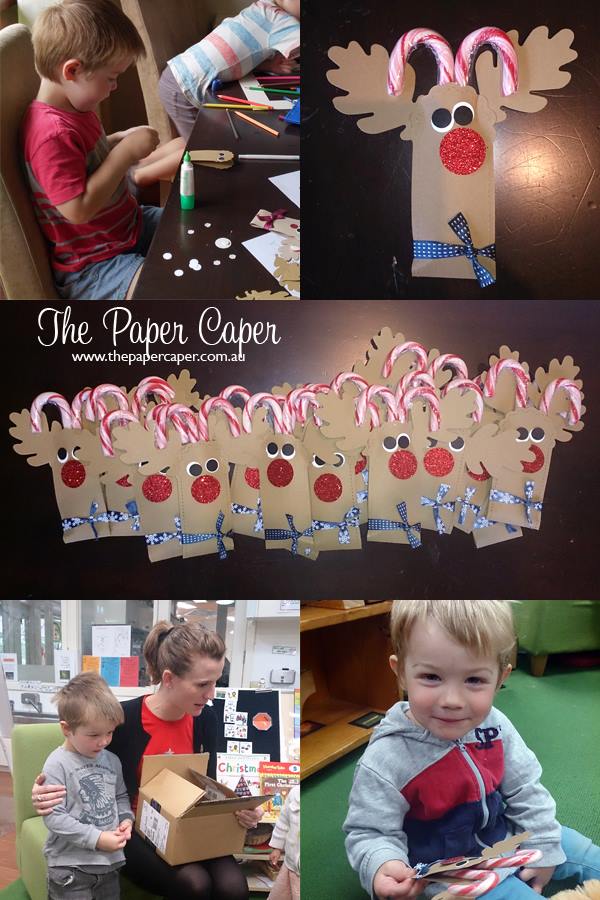
Enjoyed some treasured crafting time with my Master 3 today as he created some gifts for his playgroup friends. I punched and die-cut all the pieces and he stuck them all together himself. He was particularly keen on peeling off the backing paper on the Stampin’ Dimensionals!

We used Whisper White, Basic Black and Baked Brown Sugar cardstock, 1/2″ Circle Punch, Owl Builder Punch (for pupil) and 1″ Circle Punch, Midnight Muse 3/8″ Stitched Satin Ribbon, Autumn Accents Bigz Die and retired Two Tags die. All are avilable at my online store except the retired Two Tags Die… BUT… could these be featured in the Clearance Rack Blitz? Starts tonight at midnight. Stocks are only available while they last so make sure you check it out if you’re up late or pop on before work tomorrow!

Clearance Rack Blitz and Online Store here!

Pics below of the Rudolf’s being created, the final posse, handing them out with his teacher and little Mister 2 very happy at finally receiving one after watching them being made at home.

jem's_rudolf_stampin_up

Happy classmate gift making!

Jess x

Taggin’ Bags

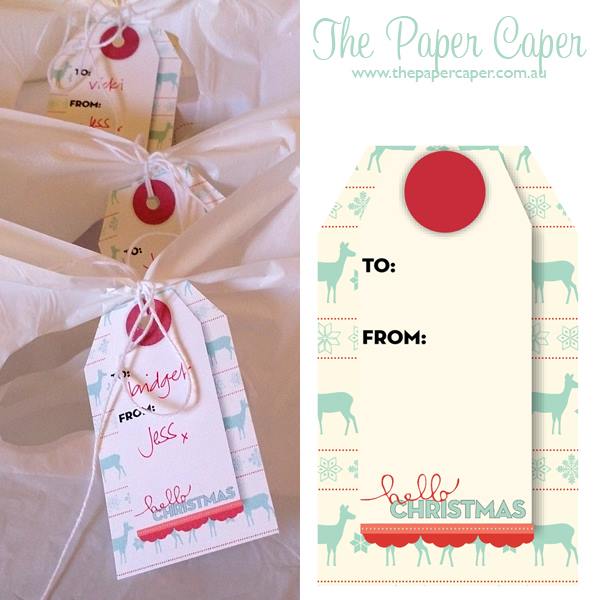
Whenever I deliver orders, I love to bag them up and attach personalised tags. It makes it super easy for the hostess to distribute each guest’s order and they look so pretty! I hope it also inspires my customers to create their own tags for gifts etc. or gain ideas for using specific products that I’ve used.

I try to craft the tags whilst I’m waiting for the big brown box to arrive but sometimes I just don’t get the time and it’s here before I’m ready. I certainly don’t want to make my hostesses and customers wait any longer for their orders because if they’re anything like me, they’ll have been dreaming of what they’re going to create with their orders and are just itching to get them in their hands. When a problem like this arises, I have the answer! MDS!

It’s just SO easy to create a tag template in minutes on MDS, then print, punch a hole and attach. I created the tags below with the Jingle and Joy digital kit (my Christmas fave) and I hope they showed off just how useful MDS can be. The best part is that you can try MDS absolutely free with the 30-day FREE trial! Woohoo. I know you’ll love it just as much as I do!

mds_tag

Happy (speed) crafting!

Jess x

The new MUST HAVE

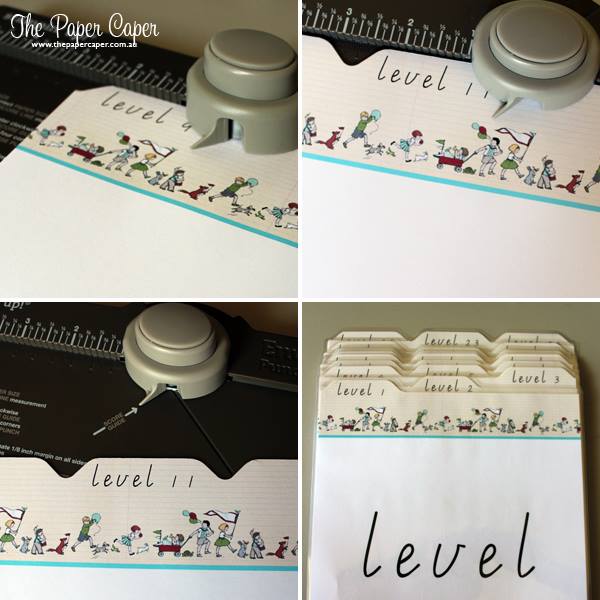
Last week I ran a workshop where 7 out of 9 guests purchased the new Envelope Punch Board! Yes, it’s a must have! Sure it makes any size envelope you like but did you know you can also make boxes, Christmas crackers and other projects?

Here’s a quick project I made below for my son’s classroom. The boxes of readers were a little disorganised so I whipped up some new tab dividers. Much easier for both the kids and parent helpers to use. Love having useful tools and images (from MDS) at my fingertips!

envelope_punch_board_stampin_up
Jess x

Avery in a template

This week’s challenge over at the Simply My Digital Studio Challenge group on Facebook involved creating a scrap page in just five minutes with MDS. The idea is to select a template and make a few changes all within five minutes. I decided to scrap some photos taken at my youngest son’s birthday.

First a pic of the template I chose to adapt…

Picture1

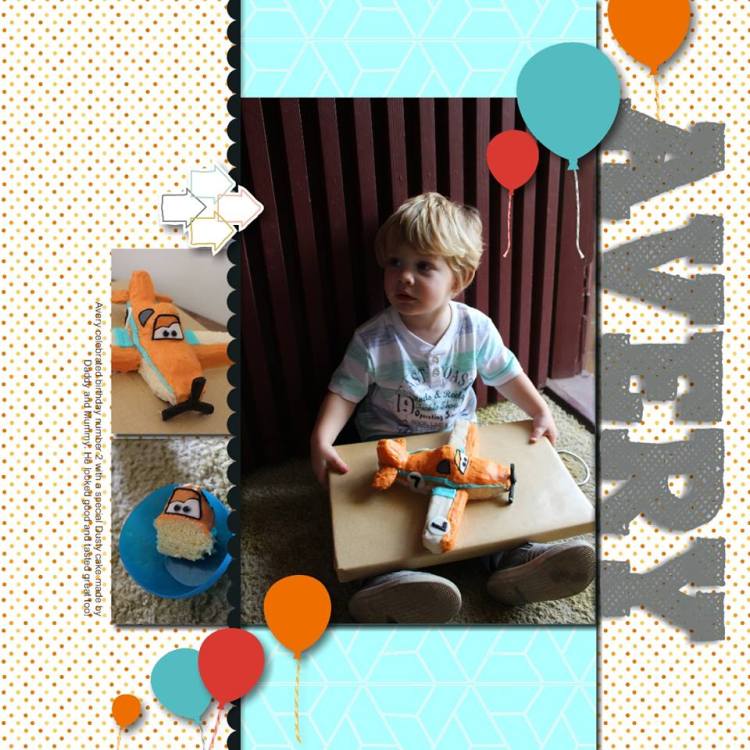
As you can see, the page is a little feminine for a little boy birthday, so a few changes there, plus, most of my photos were portrait. Not to worry, the whole template can be rotated and changing the background is as easy as selecting some different digi designer series paper. I found some balloons amongst my digi stamps and replaced the butterflies and lastly changed the title.

Here’s my finished page…

avery_tamplate_stampin_up

It looks a little different and I’ll admit that it did take a little longer than five minutes but it was still much quicker than creating from scratch. I do love participating in these challenges as it makes me learn about and use a different part of MDS.

Want to MDS too? You can even try it out for free. Click here to start downloading!

Jess x

Thank you Stampin’ Up!

One of the first things that stood out in this year’s Stampin’ Up! catalogue was the amazing array of gorgeous projects to inspire us. I quickly found a favourite and topped up my supplies with the products I would need to complete it. Well… life got in the way for a while (ok, about 4 months) but I’ve finally got around to mounting my stamp set and CASEing this gorgeous card. My thanks to the artist at Stampin’ Up! who designed this one. I LOVE it!

stampin_up_thank_you_catty_case

Join for $25

To celebrate Stampin’ Up!’s 25th anniversary, they’re giving you the opportunity to join the team for just $25! That’s a saving of $144! Incredible. This offer is limited and avilable only between 7th October 2013 and 21 October 2013.

You’ll enjoy the same perks as always, including a minimum of 20% off all stampin’ Up! products. Plus with Stampin’ Up!, there are NO requirements to run workshops/parties. You have the ability to run your business, your way, whether that be simply purchasing discounted product for yourself, selling to family and friends, quitting your day job and Stampin’ Up! full time or anything in between!

I love being a demonstrator for many reasons. I love the product. I love being able to fund my own hobby without needing the ‘family money’ and I love all the like-minded friends I’ve met.

To jump straight in, click here to join online or contact me with your questions and I’ll be happy to answer them and talk through your specific situation. I’ll be frank though, there is NOTHING to lose with this offer!

Flyer_Join_demo_Oct0113_SP(1)

Something Old, Something Brand New

It’s been a while since I posted a blog entry and it’s not because I haven’t been creating. I have! I’ve been sharing some lovely Christmassy things on Facebook and they just haven’t made it to the blog somehow! So I wanted to share a project tonight that’s quite old, but hasn’t been shown off yet. Because I made it some time ago, a few of the products used are now retired but could easily be substituted for any of our delicious current products.

IMG_4615 copy

This was one of those times I wanted to create something that I hadn’t ever seen before. I created the bird bath from scratch and although it’s not quite perfect, I think it does the job. I placed a disc of blue card stock in the bird bath and covered it with Crystal Effects to create the water. The two little birds are made from a template which I’ve shared before and are so much fun to make, even if they take a little time and patience. The rose is my own creation, using the (now retired) Blossom Petal Builder Punch and wire. There you go… my something old.


Now for something new… A brand new blog and website! Yep, I’ve now got my own little place in the world wide web. You can visit me any time at www.thepapercaper.com.au. You can keep up with my Stampin’ Up! happenings including promotions, projects and classes etc. I’ll also continue to post on my Facebook page so make sure you’ve liked that as well. Have fun browsing around my site 🙂

Samples for show

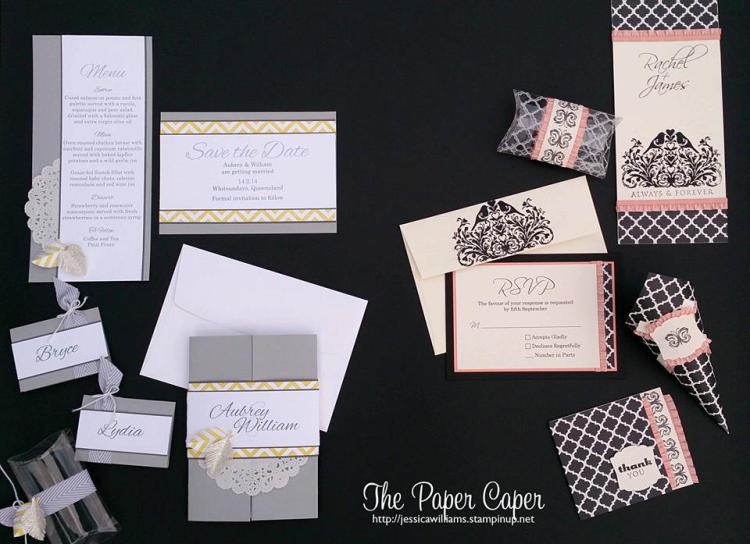
I love showing how versatile Stampin’ Up! products are and how they can be used in very different applications. Most of the time, I make cards with the odd 3D project thrown in to keep things interesting. Recently I’ve been busy making samples of wedding stationery suites including invites, place cards, keep the date cards, bonbonierre packaging, menus and confetti/petal holders etc. You can make some gorgeous things for your special day or any special event you may have on the horizon.

All my samples will be on show at the upcoming Melbourne Craft and Quilt Fair, 25-28 July at the Melbourne Exhibition Centre. I’ll be on the Stampin’ Up! stand on Thursday and Sunday so if you’re going along be sure to pop by the stand and say hello, I’d love to meet you.


wedding_invites_stampin_up

Jess x

My (amazing) Digital Studio!

I imagine that many of you, like me, are time poor. We are so busy that sometimes it’s hard to find time to create. Often, even when I do have a moment, I don’t really feel like getting everything out because that means I’ve got to put it all away again.

Solution and my current hero: My Digital Studio!

It’s just so easy to drop into the computer chair, open the program and start playing. The best part is that it’s so easy and there are so many online video tutorials to help you get started. I’ve also joined a facebook group for MDS called Simply My Digital Studio. There are weekly video tutorials teaching you how to do a certain element within the program. It’s great to learn something new every week.

This week, they took a break from techniques and had a sketch challenge instead, making it so easy to create a project. Here is my creation.

I was desperate to play with some of the new Stampin’ Up! colours and this Autumn snap of my DS1 gave me the perfect opportunity. I literally made this page in about 45 minutes. I LOVE MDS!

If you’d like to play for yourself, you can download a FREE 30 day trial. Just pop over to my online store and puchase for $0.00! What have you got to lose?

Until next time, happy crafting!

Jess x

Creped Filter Paper Rose Tutorial

Read on for instructions to make my rose using Stampin’ Up! Creped Filter Paper, as shown in the Demonstrator Theater at the South Pacific convention.

Note: Apparently my little old point and click Canon doesn’t really like to focus on filter paper so I apologise for the quality of some of the photos. Have popped in my request to hubby for an upgrade for my upcoming significant birthday!

You will need Creped Filter Paper, Floral Frames Collection Framelits & Big Shot, Paper Snips, Aqua Painter, Reinker in your choice of colour (I used Raspberry Ripple), wire, florist tape and a skewer or toothpick.


Cut one flower using the largest framelit die. Cut one and one half flowers using the second largest framelit die.


Using your paper snips, cut the half flower in half, then partially snip between petals (see picture below) to create joined petals. Repeat for remaining piece.


Snip smaller full flower in half, then snip off one petal completely. Partial snip between three remaining petals. Repeat for second half. Snip full large flower into two pieces, one having three petals, the other, five petals. Partial snip between petals. You should now have 2 x small single petals, 2 x small double petals, 2 x small triple petals, 1 x large triple petal and 1 x large group of five petals.


To make flower, start with single petal and lay wire on top.

Note: I used 28 guage wire doubled because that’s what I had. If you used a stronger wire, a single piece would suffice.


Fold over wire and roll creating centre or rose.


Tape in place with florist tape, remembering to stretch tape to release tack.


Continue to wrap petals around wire, filling in gaps and taping at base after each layer. Start with single petals, then doubles, triples etc. until you have wrapped the final five petal piece around the entire flower.


You should end up with something that looks like this…


Now for the fun part! Colour your flower with your tinted aqua painter (simply fill with water and add desired amount of reinker). Don’t be too careful, just splash it on and try to cover all of the white creped filter paper. Once dry, you can repeat with a second colour to create a dual coloured rose.


Once your rose is dry, it will look like this.


To shape rose, pull back petals until you can access the centre petals. Using your skewer or toothpick, curl sides of each petal toward the outside/underside of the rose. Repeat for each petal.


To finish, be sure to wrap the rest of the stem with florist tape, add calyx and some leaves. Now step back and admire your handiwork!


I hope you enjoyed making your Creped Filter Paper rose! Why not make some more and display them in your home or give them as a gift to someone special. I gifted one to each member of my team at convention. Here they are, all ready to go…


Happy crafting!

Jess x